For installation and setup instructions, please start with the PDF Embedder Premium instructions. The options common to both PDF Embedder Premium and Premium Secure plugins are detailed here.
You need to make sure that you have PDF Embedder Free installed and activated.
This page explains how to use the extra functionality provided by the Secure (Pro license level) version only.
Important: If you are using any caching tools on the site either by the hosting provider or third-party plugin such as Autoptimize, WP Rocket, etc. please ensure you take the steps to exclude the PDF Embedder plugins from the caching tools. Full instructions here: FAQ on using caching / minifying tools.
Secure PDFs
If you are using the Premium Secure version of the plugin - which makes it difficult for users to obtain the original PDF directly - all your PDF uploads after upgrading to the secure version should be 'secure' by default. That is, they should be uploaded to a /securepdfs/ sub-folder of your uploads area. These files should not be accessible directly, and the plugin provides a backdoor method for the embedded viewer to obtain the file contents.
To check whether an embedded document is displaying securely, log in to your WordPress site as an administrator and visit the page containing the embed. The toolbar should display the word 'Secure' if the secure mode is on. The word 'Secure' will not display to ordinary users or if you are not logged in to your site.
Certain non-standard WordPress configurations may cause the download protection to fail, so for your first attempt at a secure embed, please also visit the 'url' contained in the shortcode. E.g. https://mysite.com/wp-content/uploads/securepdfs/2015/01/Doc.pdf. You should be unable to download the PDF.
If your web server is not using Apache, you may need to protect the /wp-content/uploads/securepdfs/ directory from direct access. For example, using Ngnix, see this example configuration.
Please contact support if you have any questions at all about your WordPress configuration.
Secure options
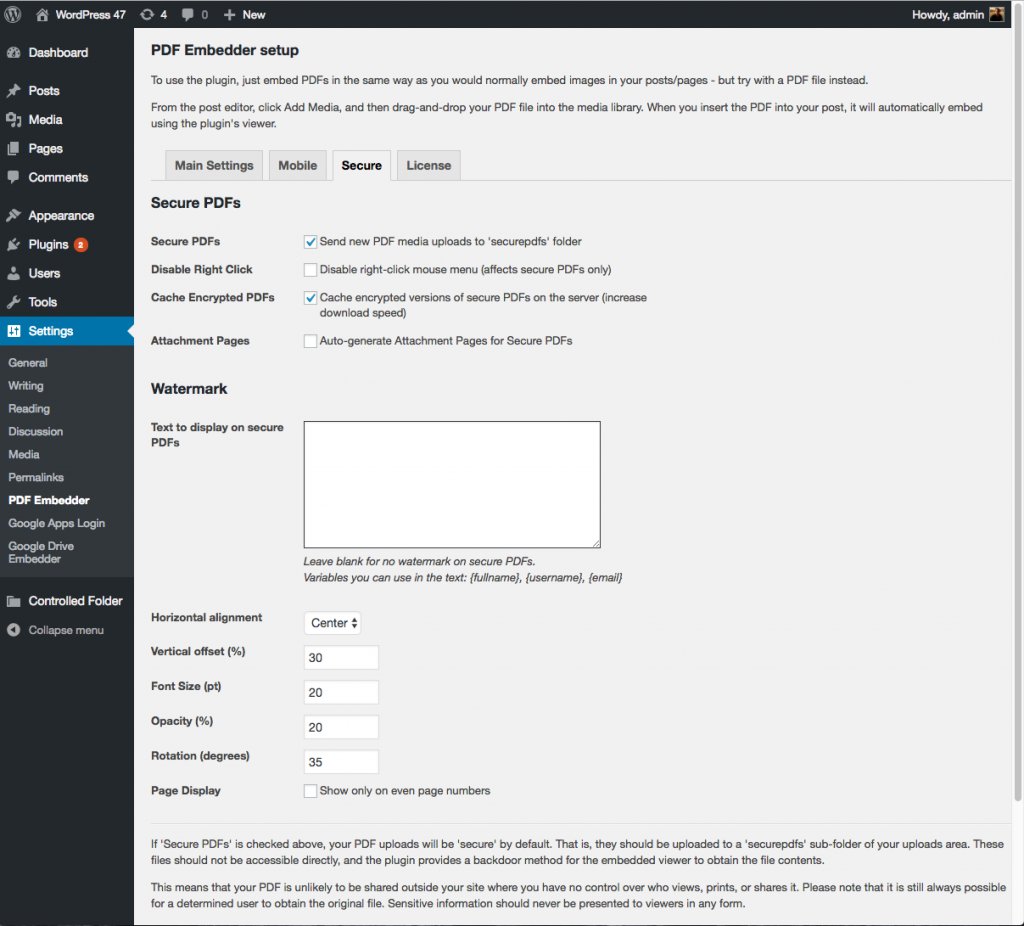
In Settings -> PDF Embedder, the Secure tab will have some extra options.
Send PDF media uploads to '/securepdfs/' folder - this is checked by default, and means that uploaded PDFs will all be treated as secure. If you turn it off then any subsequent uploaded PDFs will be 'non-secure' when viewed. Use this if you don't always want to use 'secure mode' on all PDFs, e.g. for performance reasons.
Disable the right-click mouse menu - check this to prevent the user from being able to right-click on the viewer. In some browsers, right-click mouse menus include a 'Save Image As' function, which is probably not desired if you're trying to protect your PDF from being downloaded. The option in settings will act globally on all secure embeds as a default; it can be overridden for any specific embed by adding disablerightclick="on" (or "off") to the shortcode.
Cache encrypted PDFs - before transmission to the user's browser, a 'secure' PDF is first encrypted. This takes time, so it can speed up subsequent displays of the document if the encrypted version is cached. Then on future views, the encrypted data is ready to be sent straight to the browser. The cache is on by default and places files alongside the original PDF. The PDF will be encrypted again if the source PDF is altered.
Attachment Pages - check this box to enable Attachment Pages to be generated for secure PDFs. These offer a way to automatically generate a WordPress page that contains an embedded viewer of the PDF. Find out more about Attachment Pages here.
Watermarks
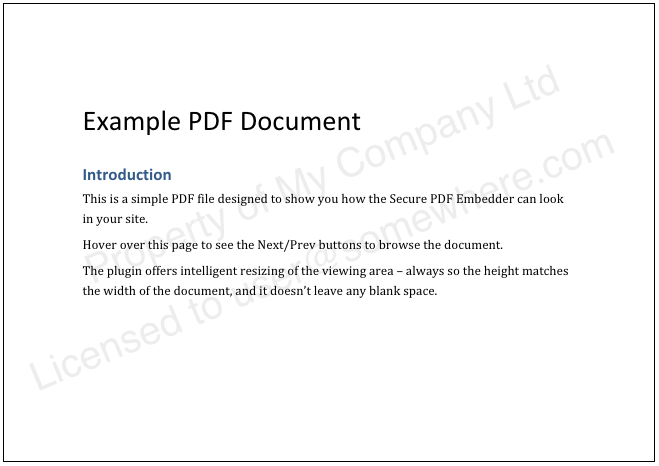
If you're concerned that users might attempt to share screenshots of your embedded documents, or you just want to remind them that you own the PDF, you can specify some 'watermark text' that will appear transparently on every PDF that is displayed securely. For logged-in users, you can display the user's email address, name, or username as part of this watermark text. This is useful if your PDFs are only visible to logged-in users in the first place - but of course, there is not always a way to display the user's email address if the PDF is embedded on a page where logged-out users can view it anyway.
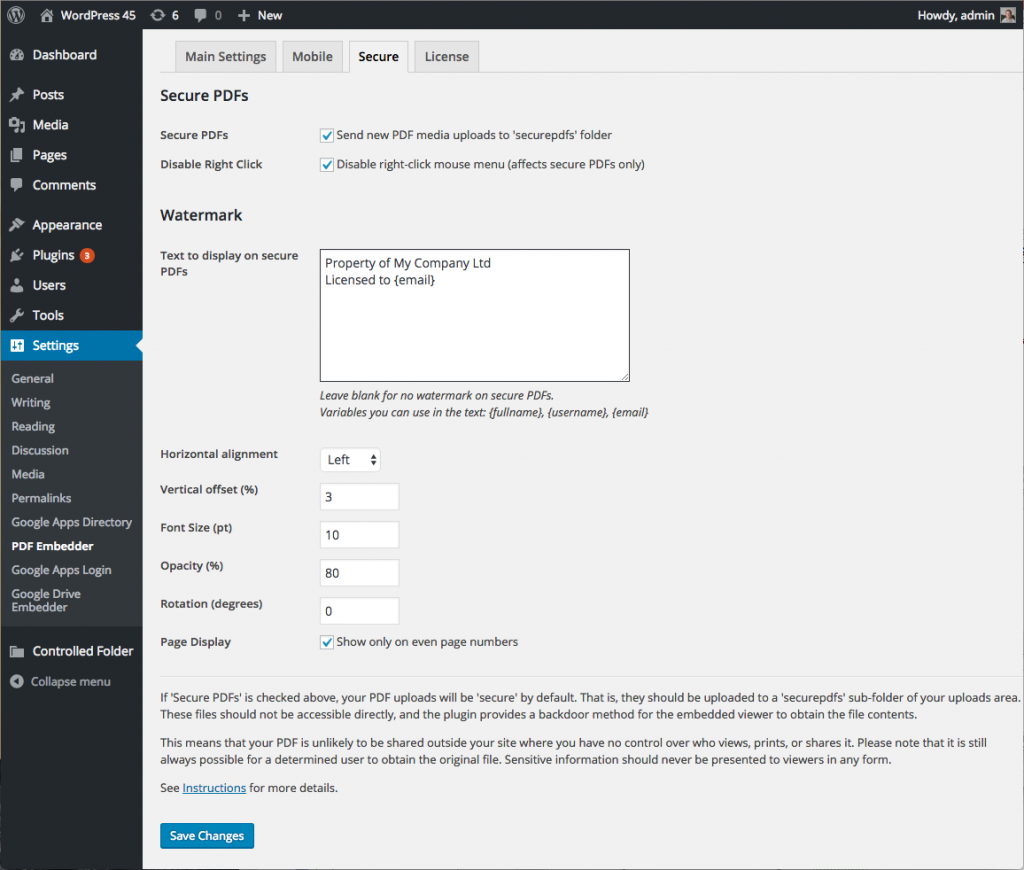
To specify watermark text, go to the Secure tab of Settings -> PDF Embedder.
In the Watermark section, enter lines of text that you'd like to be displayed. You can use the placeholder variables {email}, {username}, or {fullname} where you would like the logged-in user's details to be substituted.
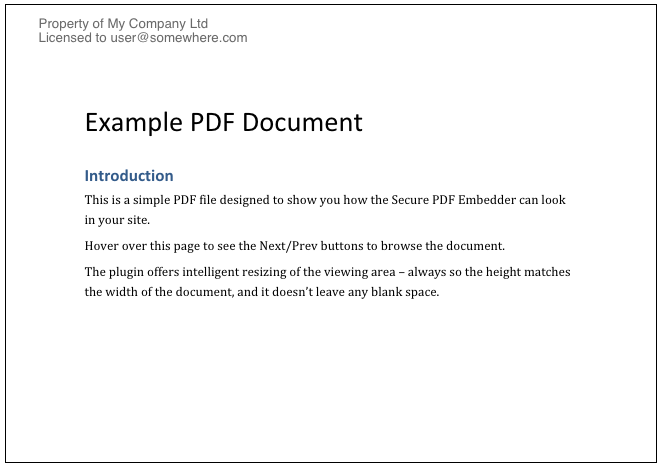
There are also settings to control the visual appearance of the watermark. The settings shown in the screenshot above display the text fairly prominently in the top-left margin of the document - the font size is fairly small (10pt), the text will be drawn close to the top-left of the page in the margin (just a 3% vertical drop, horizontal alignment of 'left'). The opacity is 80%, so fairly bold. With 0 rotation, the text will be in line with the rest of the text on the page. It looks like this:
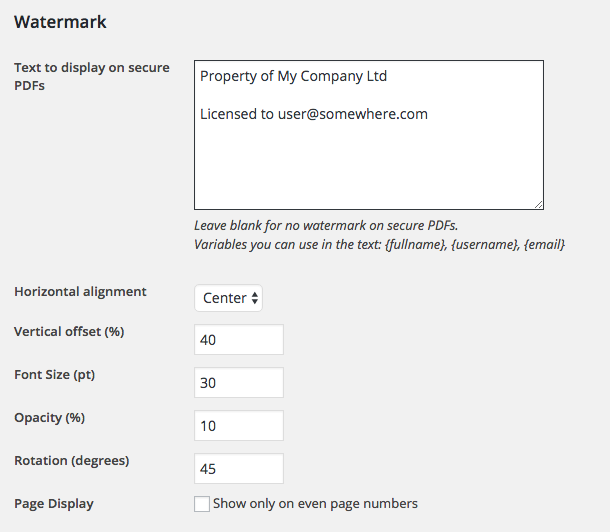
If you want the watermark to appear larger and as more of a background image, you could try settings like these:
For a display more like this:
Please note that if you have enabled the option allowing the user to download the PDF (which is not normally desired with 'secure mode' PDFs), the downloaded PDF will not contain the watermark.
Support
We would very much like to hear from you with any questions or feedback at all. Please email us here.
There is also a knowledge base where you can find answers to common questions.
